Printing: Color Management
Communication Is Key for Proper Color Management
Printing on flexible packaging is broken into two categories: surface-printed and trapped printing.
Surface printing deals with ink being laid on top of the film itself. This is considered old-fashioned, as the ink is exposed and without a varnish sealant layer the ink can be scratched or even flake off over time. Further, surface printing has shown that it is not capable of producing high-quality or photographic images that most printed customers are looking for.
Trapped printing deals with multiple layers of film, where each individual layer serves a particular purpose. The printed layer is just one piece of this process. In fact, the printed layer is almost always a clear film that, by itself, is extremely thin and flimsy. This printed layer is then “trapped” and laminated to other layers above and below it. Some layers laminated to the printed film provide high barrier protection, some layers produce heat seal-ability while others are used for puncture resistance, etc. The printed layer is made separately and can be printed with much higher quality using bold and vibrant colors. It is then laminated to other layers, so the printing is now trapped and protected from being scratched or marred, and the film itself has the strength and durability to be converted into pouches and bags.
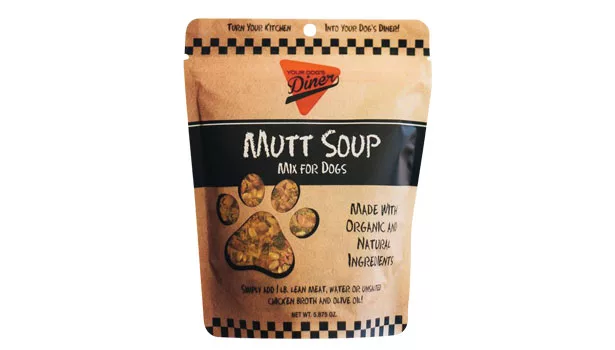
Assume a client has decided on a stand-up pouch that is trapped printing. Marketing and sales have decided on a particular stand-up pouch with a clear window shaped like a paw print. Everything else is printed, except the paw print. Imagine that this is the first time this company has done a printed stand-up pouch.
The graphics department now needs to create artwork that matches what it has used for packaging in the past, such as the carton and/or the label applied to
the pouch.
Stand-up pouches are made from laminating multiple layers of barrier film together to create the strength to allow the bag to stand, while at the same time, creating the barrier properties to protect the contents and keep them fresher for longer. One of these layers is the printing for this pouch.
Because we have a clear, paw-print-shaped window, the printing is done on a very thin layer of film called a clear film. Laying down ink on a clear piece of film leads to another problem: the ink and printing looks translucent, dull and even grainy. To make colors stand out, the entire surface of this film, except for the window, needs a base layer of white put down. This base of white allows the true colors to show. Once this printed layer is made, it is “sandwiched” or trapped between other layers and then converted into pouches. However, each layer added to the printed layer does affect the final color. Each time another sheet is added, that further mutes the finished color.
If this pouch were printed without a window, the printed layer would still be on clear film, but the sandwiched layers would be opaque. Some examples of opaque film laminated to this clear layer are foil, metalized film (Mylar) and even converted white film.
Surface printing is similar. If the ink is laid onto clear film, it will look dull, so either a white base layer is added, or the ink is placed onto an opaque film. Finally, with surface printing, many companies will lay a final coating or varnish over the printing to protect the ink and “attempt” to prevent it from being scratched or marred off.
Here are some suggestions to minimize the number of colors and cost of your printed flexible pouch:
- Become familiar with the artwork guidelines that your manufacturer provides. Most of the answers to common questions are generally provided in that document.
- Reach out to the manufacturer’s graphic designer. Clearly explain what you are trying to do, create, match, etc. (including minimize cost).
- Are you trying to match something already in existence, like a carton or a label? Send it to your flexible packaging manufacturer before you create your artwork or even send your file. The company will have their own graphic designer to discuss particular color matching options.
- Be honest and tell the flexible film manufacturer you have never done this before and/or need help. This will save you a lot of time and money.
- Discuss using CMYK process inks and PMS spot inks with your flexible film graphic designer to achieve the final look and printing you want. If there is a color you must have, PMS spot inks are more vibrant, crisp and consistent. CMYK can be used for all the other colors.
- Think “Less is more”: Consider using a clear window or windows on a pouch and let your product be the focus of the packaging, instead of printed graphics.
- If you need an opaque bag, consider using the shiny silver of the metalized film, the gray of foil, or white of an actual white layer of film to be one of your colors.
Again, let the structure shine through and be part of your finished artwork. This will also reduce the number of colors ultimately needed for your job.
Clearly, there are lots of variables to think about, but the one key thing that keeps coming up is to communicate. Even better, use all of the communication tools at your disposal. Send emails, make phone calls, send samples, and by all means, conduct a conference call with everyone involved in the project, so all issues are discussed. In the end, the printed flexible packaging will look amazing, the customer will be happy and the total cost will be minimized.
Stand Up Pouches
(866) 440-2123; www.standuppouches.net
About the Author
David Marinac is president & CEO of Stand-up Pouches, since 2007; president & CEO of ABC Packaging Direct since 1998.
Looking for a reprint of this article?
From high-res PDFs to custom plaques, order your copy today!